Page 18 of 26 FirstFirst ... 81617181920 ... LastLast
Results 341 to 360 of 516

Thread: ITS Ford Mustang(s) Build - Stripper Stang Part II

  1. #341
    Join Date
    Jul 2004
    Location
    Raleigh NC
    Posts
    3,682

    Default

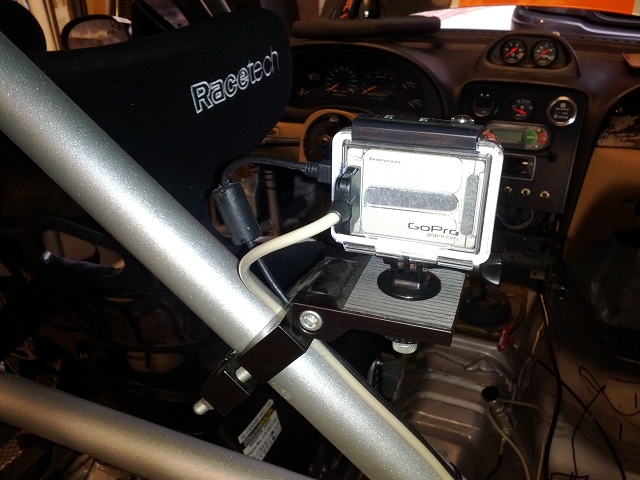
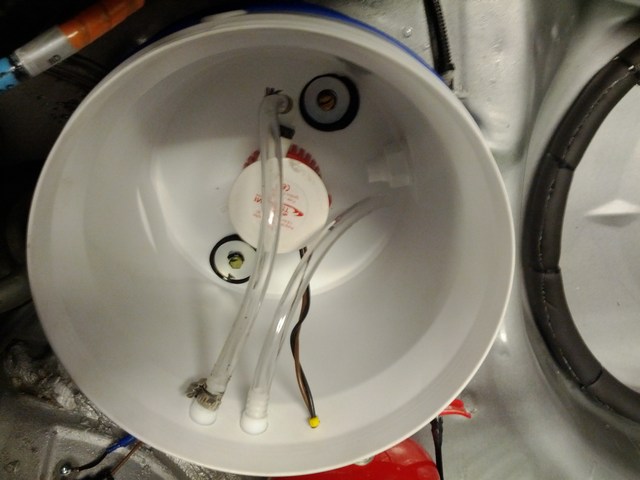
    Data acquisition is taking a lot of time due to wiring and setup of various devices. For example, on the GoPro camera with the Tmate the housing must be cut in numerous places to allow for the data cable, power cable, and the SD card to be removed and inserted.


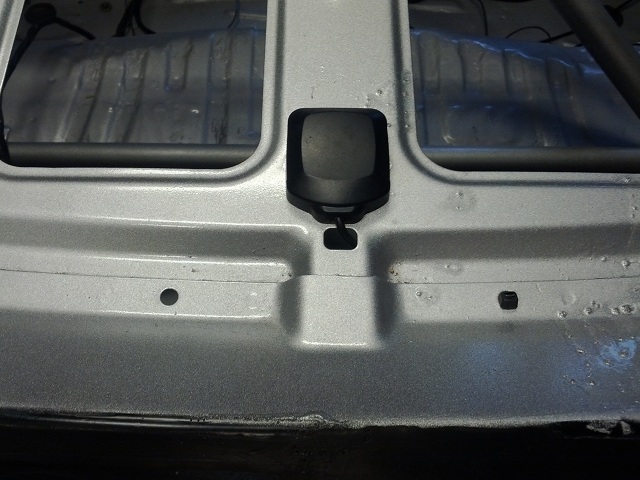
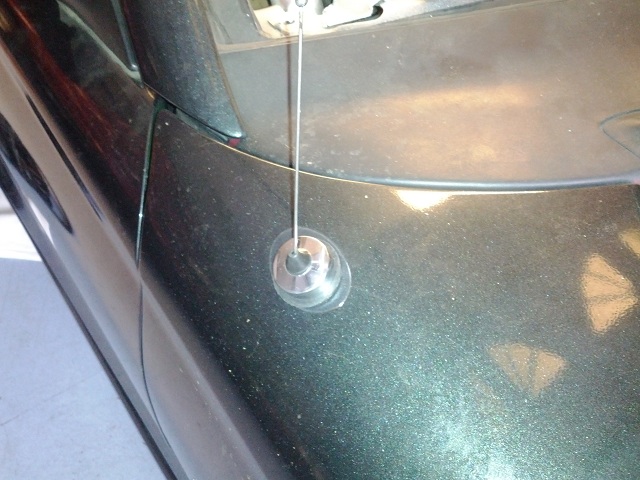
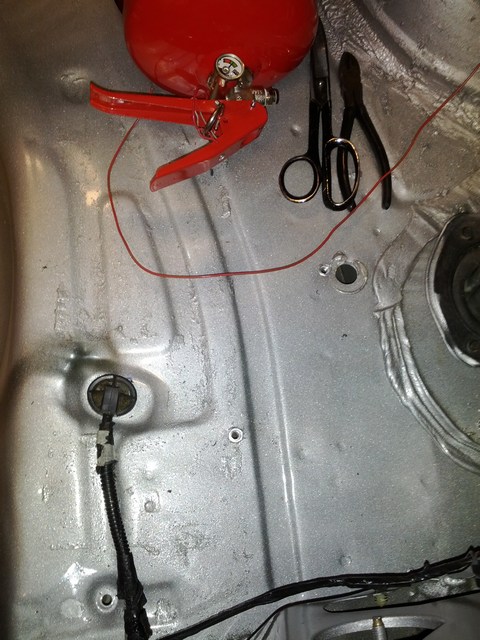
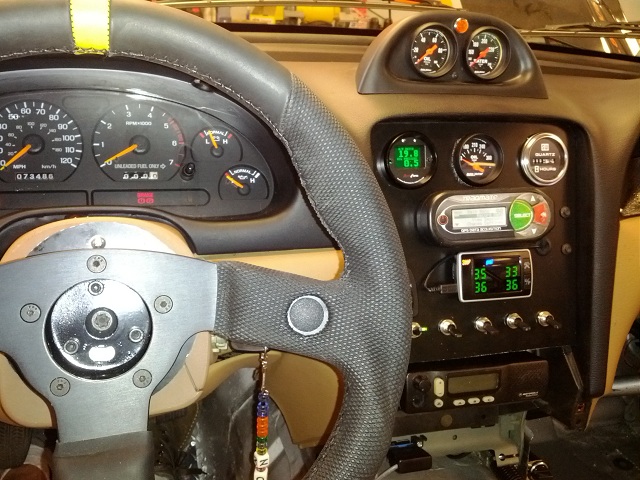
    The radio antenna was put in the stock location but I'm not sure how I like that or if it'll be optimal for functioning.


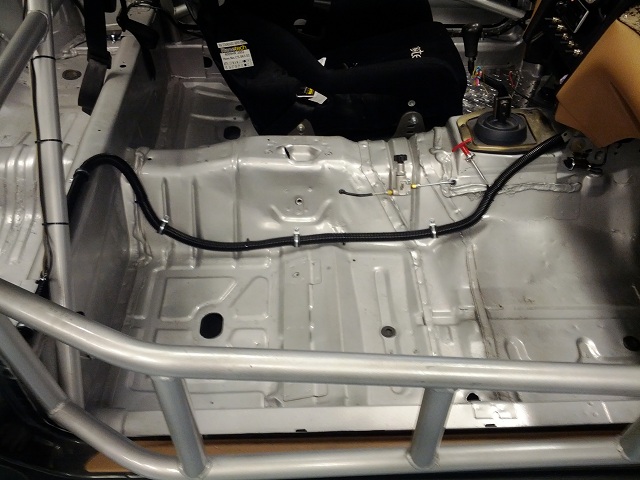
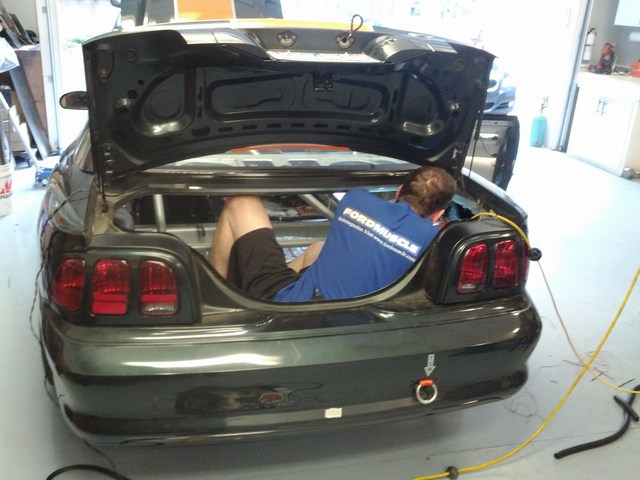
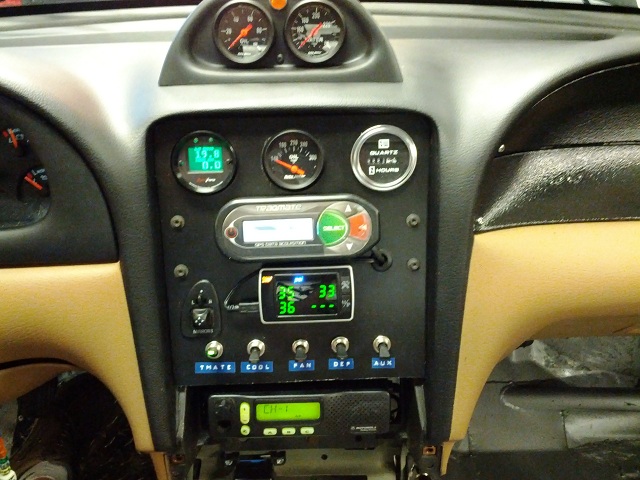
    I've still got mucho wiring to do for getting signals into the Tmate but at least there is light at the end of the tunnel.

    We're planning to have the green car up at the May VIR event, at least for the test day, so I've got to get the wiring knocked out before this weekend. Glass has to be installed on Thursday, oil leak fixed, then we've got to spend Sat aligning the car. Hopefully it'll be road worthy on Sunday so we can hit the streets and dyno tune it the following weekend.

  2. #342
    Join Date
    May 2001
    Location
    IT.com "First Loser" Greensboro, NC USA
    Posts
    8,607

    Default

    Cameron would probably chime in and talk about antenna ground planes and all that voodoo. Short answer always seems to be 'middle of the roof' for those things.

    K

  3. #343
    Join Date
    Jul 2004
    Location
    Raleigh NC
    Posts
    3,682

    Default

    Quote Originally Posted by Knestis View Post
    Cameron would probably chime in and talk about antenna ground planes and all that voodoo. Short answer always seems to be 'middle of the roof' for those things.

    K
    I know, but at least I scraped the hell out of the underside of the hole so it'd get a good chassis ground on bare metal. And it is fairly easily moved. The old Z worked pretty well mounted like this one is, in the OEM hole on the fender.

  4. #344
    Join Date
    May 2008
    Location
    CT/NY/NJ
    Posts
    1,157

    Default

    nice touch Ron!
    Chris Rallo "the kid"
    -- "wrenching and racing" -- "will race for food!" -- "Onward and Upward"

  5. #345
    Join Date
    Jul 2004
    Location
    Raleigh NC
    Posts
    3,682

    Default

    A couple of shots showing routing for cable bundles. I know it is boring, but a hell of a lot of work goes into getting the bundles routed efficiently. The big one carries camera data, power, cool suit power, fire pull, 12V accessory line, plus a spare deactivated 12V should the need arise. The little one on the drivers side has fuel pump 12V, fuel level sender, plus brakes, turn signal, and running lights.


    With the exhaust now having been switched to the passenger side I'm not concerned about that cable bundle getting too warm.

  6. #346
    Join Date
    Jun 2004
    Location
    Margaritaville
    Posts
    641

    Default

    Paint the inside rear deck lid flat black......unless you don't plan on using the rear view mirror on sunny days.
    Steve Linn | Fins Up Racing | #6 ITA Sentra SE-R | www.indyscca.org

  7. #347
    Join Date
    Jan 2001
    Location
    Atlanta, GA usa
    Posts
    677

    Default

    Quote Originally Posted by Racerlinn View Post
    Paint the inside rear deck lid flat black......unless you don't plan on using the rear view mirror on sunny days.

    Or better yet, crinkle black paint.

    Had that on the old 240sx, and it was great.
    Tristan Smith
    1991 Nissan ITR 300zx #56

  8. #348

    Default

    Ron Earp: "It has a weird exhaust note tho. On the street cars it is muffled via 3 chambers, but w/a less restrictive exhaust you can hear that funky 90 degree V6 action."

    I gotta ask ... Why did you opt for a single exhaust system? Weight? Or to maintain an OE looking system (w/cat) for street legality? It seems like all that nice work on the headers would have been compromised somewhat w/the two (2) 90 degree bends on the driver's side exhaust pipe.

    Also, I am playing catchup on this post tonight & noticed back a bit that someone inferred that the V6 & GT Mustang use different front bumper covers. While the Cobra cover is unique, the V6 & GT use the same bumper cover. I have a '98 GT w/320 RWHP & w/the OE bumper cover & radiator ... & no spoiler &/or additional ducting. And I can guarantee that you will have no cooling issues.

    There was also a note about the Mustang being a "bottom feeder" ... this is correct. But that means that most of the cooling air comes thru the lower part of the bumper cover ... NOT under the bumper cover. The air passing thru the cover will form a high-pressure area which would prevent most of the air coming under the cover from going up & thru the radiator. It will, however, pass under the radiator & be drawn up to the negative pressure area behind the radiator ... & this, of course, would have a negative effect on any air attempting to pass thru the radiator. For those (ex- & current) 240Z drivers, you will remember a nifty little factory piece (74810-E4100) from the Euro model that bridged the gap from the radiator core support to the oil pan (if I recall correctly) that prevented the air from flowing up behind the radiator. With the plan for the 2015 Mustang to be marketed globally, maybe these types of crossover parts will be someday be available from Ford ... tho too late to be of any use on the SN95 Mustang (insert heavy sigh at this point).
    Last edited by FLATKITTY; 04-23-2012 at 03:41 AM.

  9. #349
    Join Date
    Jul 2004
    Location
    Raleigh NC
    Posts
    3,682

    Default

    Quote Originally Posted by FLATKITTY View Post
    I gotta ask ... Why did you opt for a single exhaust system? Weight? Or to maintain an OE looking system (w/cat) for street legality? It seems like all that nice work on the headers would have been compromised somewhat w/the two (2) 90 degree bends on the driver's side exhaust pipe.
    Check post #303, although you can't see much unfortunately from that angle. The exhaust system has been redone and now has very smooth transitions: 3 into 1 merge collector R&L, gentle transitions into a 2 into 1 merge collector in the center, then straight back to an axle dump.

    A properly sized and designed single exhaust can make just as much power, or in some cases more, than a dual exhaust. A lot of work has gone into the collectors, pipe lengths, and pipe diameters of this system. Off the top of my head there are five different pipe diameters used in this system and I hope they'll pay dividends. Don't take my word though, give some of the exhaust design shops around Moresville NC, or Burn Stainless a call, you might be surprised at the system sizing they provide . Also, on the cheap you can use PipeMax; I found that the results it returned were not significantly different from the two exhaust design places I consulted and it is definitely cheaper, $45.

    More updates coming - red car was started, green car got more progress, and I'll put the complete photo write up of the homemade coolsuit system V3.0 up as well since folks have PM'ed and emailed me about that.
    Last edited by Ron Earp; 04-23-2012 at 07:30 AM.

  10. #350
    Join Date
    Dec 2001
    Location
    raleigh, nc, usa
    Posts
    5,252

    Default

    Burns and the old HeaderDesign software (now defunct) both kicked out a single exit with a y pipe for my car (V8) as well. The exhaust note on my car is pretty mean, sounds very Winston Cupish as I think the basic design is that merge collector system than Runt Pittman put together with them in the early 90s. I have a number of different diameters in my pipes as well, nice smooth transitions, a y pipe and the a single exit.

    I'm pretty convinced the single biggest HP improvement I saw on my car was the exhaust as it is tuned to move the torque peak up and thus peak HP up.
    NC Region
    1980 ITS Triumph TR8

  11. #351
    Join Date
    Jul 2004
    Location
    Raleigh NC
    Posts
    3,682

    Default

    First up is the homemade driver cooling system, EarpCool V2.0. A few people have asked me details about making one of these and instead of writing about it I took pictures while I assembled it this weekend.

    All you need is a cooler ($8), hose ($5), insulation for the hose ($7), a live well pump ($19, bought the good one), assorted pvc barbs/hose clamps ($3), and to make it like the real deal, some dry break connectors (~$20) that you can purchase here:


    Everything else you can get from WallyWorld and you should be under $60 all in, including the connectors. If you spent more than that then you did something wrong.

    Pictures should pretty much tell the tale.


    Last edited by Ron Earp; 04-23-2012 at 09:23 AM.

  12. #352
    Join Date
    Jul 2004
    Location
    Raleigh NC
    Posts
    3,682

    Default

    Part Two:


  13. #353
    Join Date
    Jul 2004
    Location
    Raleigh NC
    Posts
    3,682

    Default

    Part Three:


    You might need to use tape as a bushing to get that little plastic barb to fit in there correctly. Apply some epoxy and call it a day.


  14. #354
    Join Date
    Jul 2004
    Location
    Raleigh NC
    Posts
    3,682

    Default

    Part Four


    And no, I have not noticed any difference in water temps by bundling the lines. I am sure there is, but these things are plenty cold.


    Very light. Weight with lines, pump, and lid was just under five pounds.


  15. #355
    Join Date
    Jul 2004
    Location
    Raleigh NC
    Posts
    3,682

    Default

    Part Five


    I put rivnuts into the steel floor to mount the cooler. Then I drilled down through the cooler and attach the unit that way. So that the bolts don't become heat sinks I bond foam and silicone over the top of them (not done yet) to insulate them from the ice water.

    It was a difficult thing to work in the trunk area for the wiring and plumbing of the fire bottle and cooler system.


    You can see the bolt heads and the sealing silicone in the bottom of the unit.

    And, tada, all done.


    Now, if you think about it ahead of time you can properly position that spigot on the side so you can drain the water out of it. All I have to to is pull up that rubber connector seal, push the button, and the water will drain out through the bottom of the car.
    Last edited by Ron Earp; 04-23-2012 at 09:24 AM.

  16. #356
    Join Date
    Jan 2001
    Location
    Buffalo, New York
    Posts
    2,942

    Default

    Ron--You make a great teacher.

    The real weight of the device is with the ice water, however.

  17. #357
    Join Date
    Jul 2004
    Location
    Raleigh NC
    Posts
    3,682

    Default

    Quote Originally Posted by joeg View Post

    The real weight of the device is with the ice water, however.
    Of course, but, this unit is lighter than the FAST unit we compared it to (it is going in the second stang) by 3lbs. And, this little unit has the advantage of a screw on top. No messy straps, latches, and all that jazz that allow the water to spill out of the cooler.
    Last edited by Ron Earp; 04-23-2012 at 09:51 AM.

  18. #358
    Join Date
    Jan 2002
    Location
    Atlanta GA
    Posts
    223

    Default

    Quote Originally Posted by Ron Earp View Post
    Of course, but, this unit is lighter than the FAST unit we compared it to (it is going in the second stang) by 3lbs. And, this little unit has the advantage of a screw on top. No messy straps, latches, and all that jazz that allow the water to spill out of the cooler.
    You need to build one for Jeff Young!!!! :026:

  19. #359
    Join Date
    Jan 2010
    Location
    Houston-ish
    Posts
    932

    Default

    Just for grins, you should have mounted the cooler right next to the fuel cell. Then try to fill them both at once. Ahhhh, things you learn how NOT to do at LeMons.
    Houston Region
    STU Nissan 240SX
    EProd RX7

  20. #360
    Join Date
    Jul 2004
    Location
    Raleigh NC
    Posts
    3,682

    Default

    Hot damn. I think I'm going to "finish" the green car today. I lot has happened over the last week with sorting and fixing various things, putting a rough alignment on the car, rough corner weighting, and tidying up lots of small jobs that needed tending to. the last two items I have to fix before the car can be driven is to mount the harness and oil catch can.

    Here is a picture of the working dash. The Aeroforce gauge there can display items off the CAN bus and log them plus sound alarms on two parameters. The wide band is displayed on this gauge as well as the oil pressure. The Traqmate is doing normal Traqmate things plus has oil pressure, wide band, water temperature, throttle position sensor, plus brake on/off, as well as controlling the GoPro HD camera. So far everything has testing as "working", although the sensors have yet to be scaled in the Traqmate.


Bookmarks

Bookmarks

Posting Permissions

  • You may not post new threads
  • You may not post replies
  • You may not post attachments
  • You may not edit your posts
  •